WooCommerce plugin
WooCommerce is an open source, completely customizable ecommerce platform for entrepreneurs worldwide. It offers a flexible way to build an ecommerce store with WordPress.
Integrate your WooCommerce site with the PayBy Payment Gateway to accept payments via debit card, credit card, netbanking (supports 3D Secure) or through any of our supported wallets.
The plugin offers seamless integration, allowing the customer to pay on your website without being redirected. This allows the plugin to work across all browsers and ensures compatibility with the latest version of WooCommerce.
Product application
Step 1: Create your account in the PayBy Merchant Portal.
| Environment | URL |
|---|---|
| Production | https://b.payby.com |
| UAT | https://uat-web-merchant.test2pay.com/ |
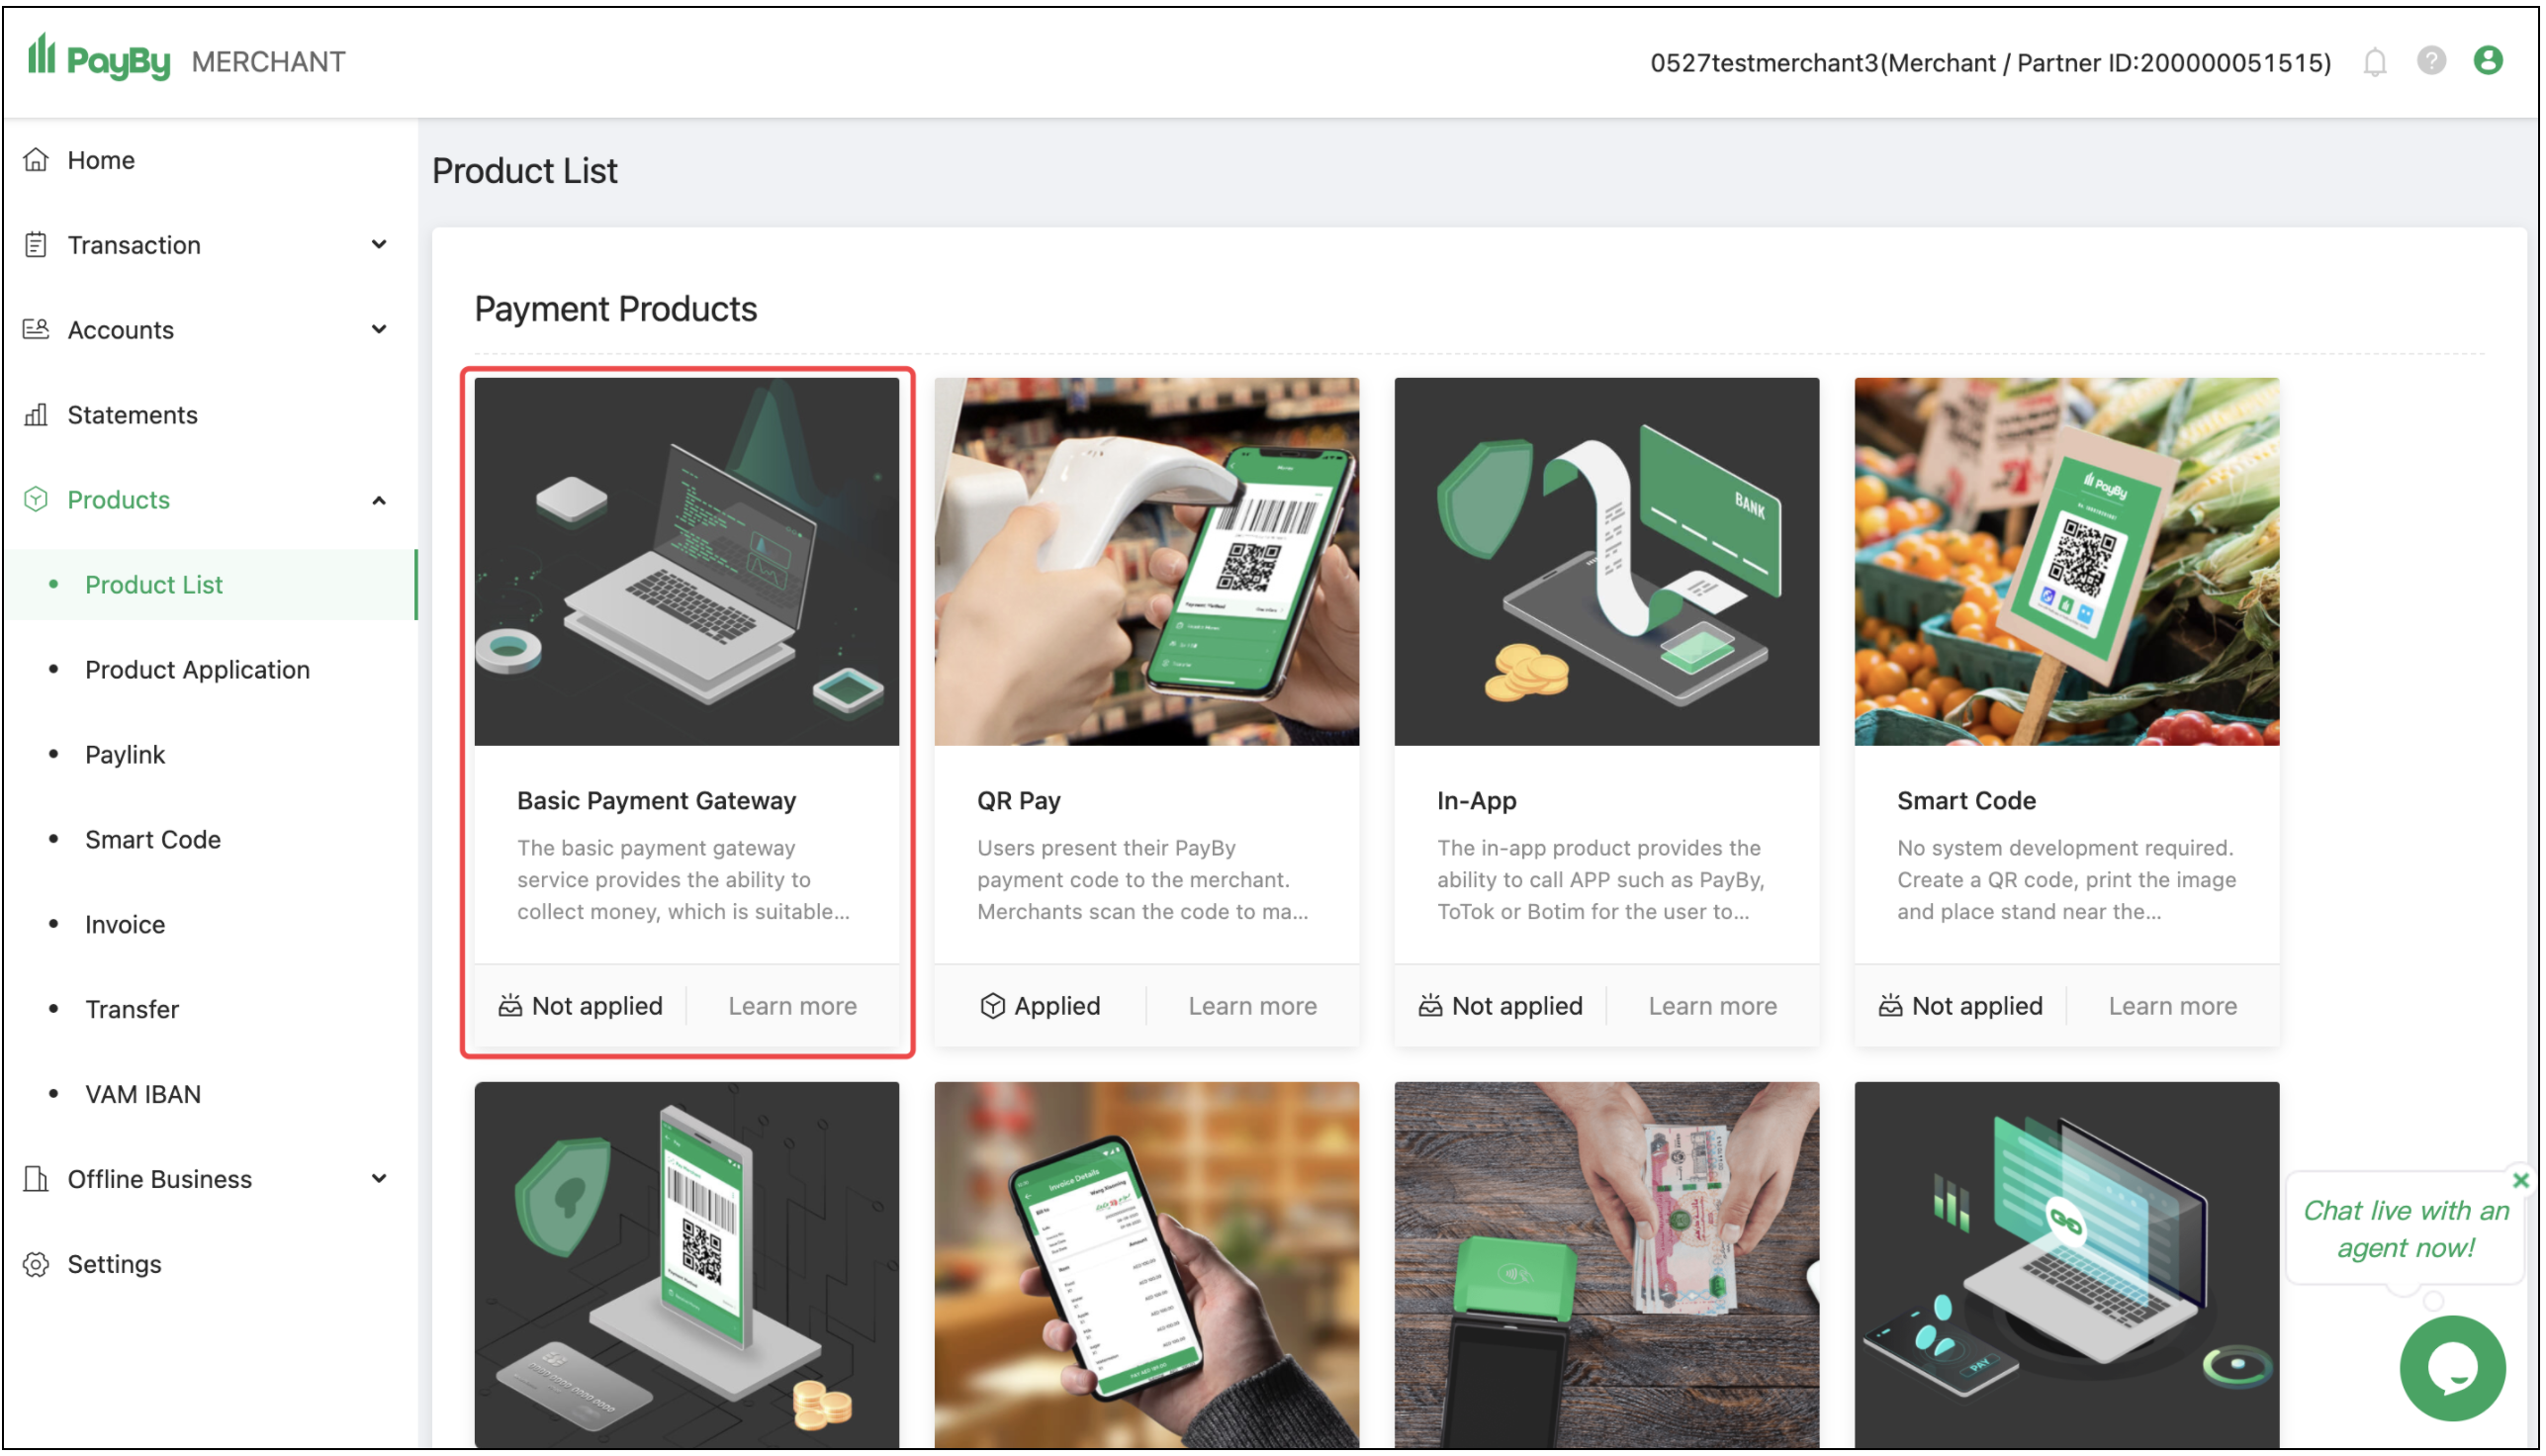
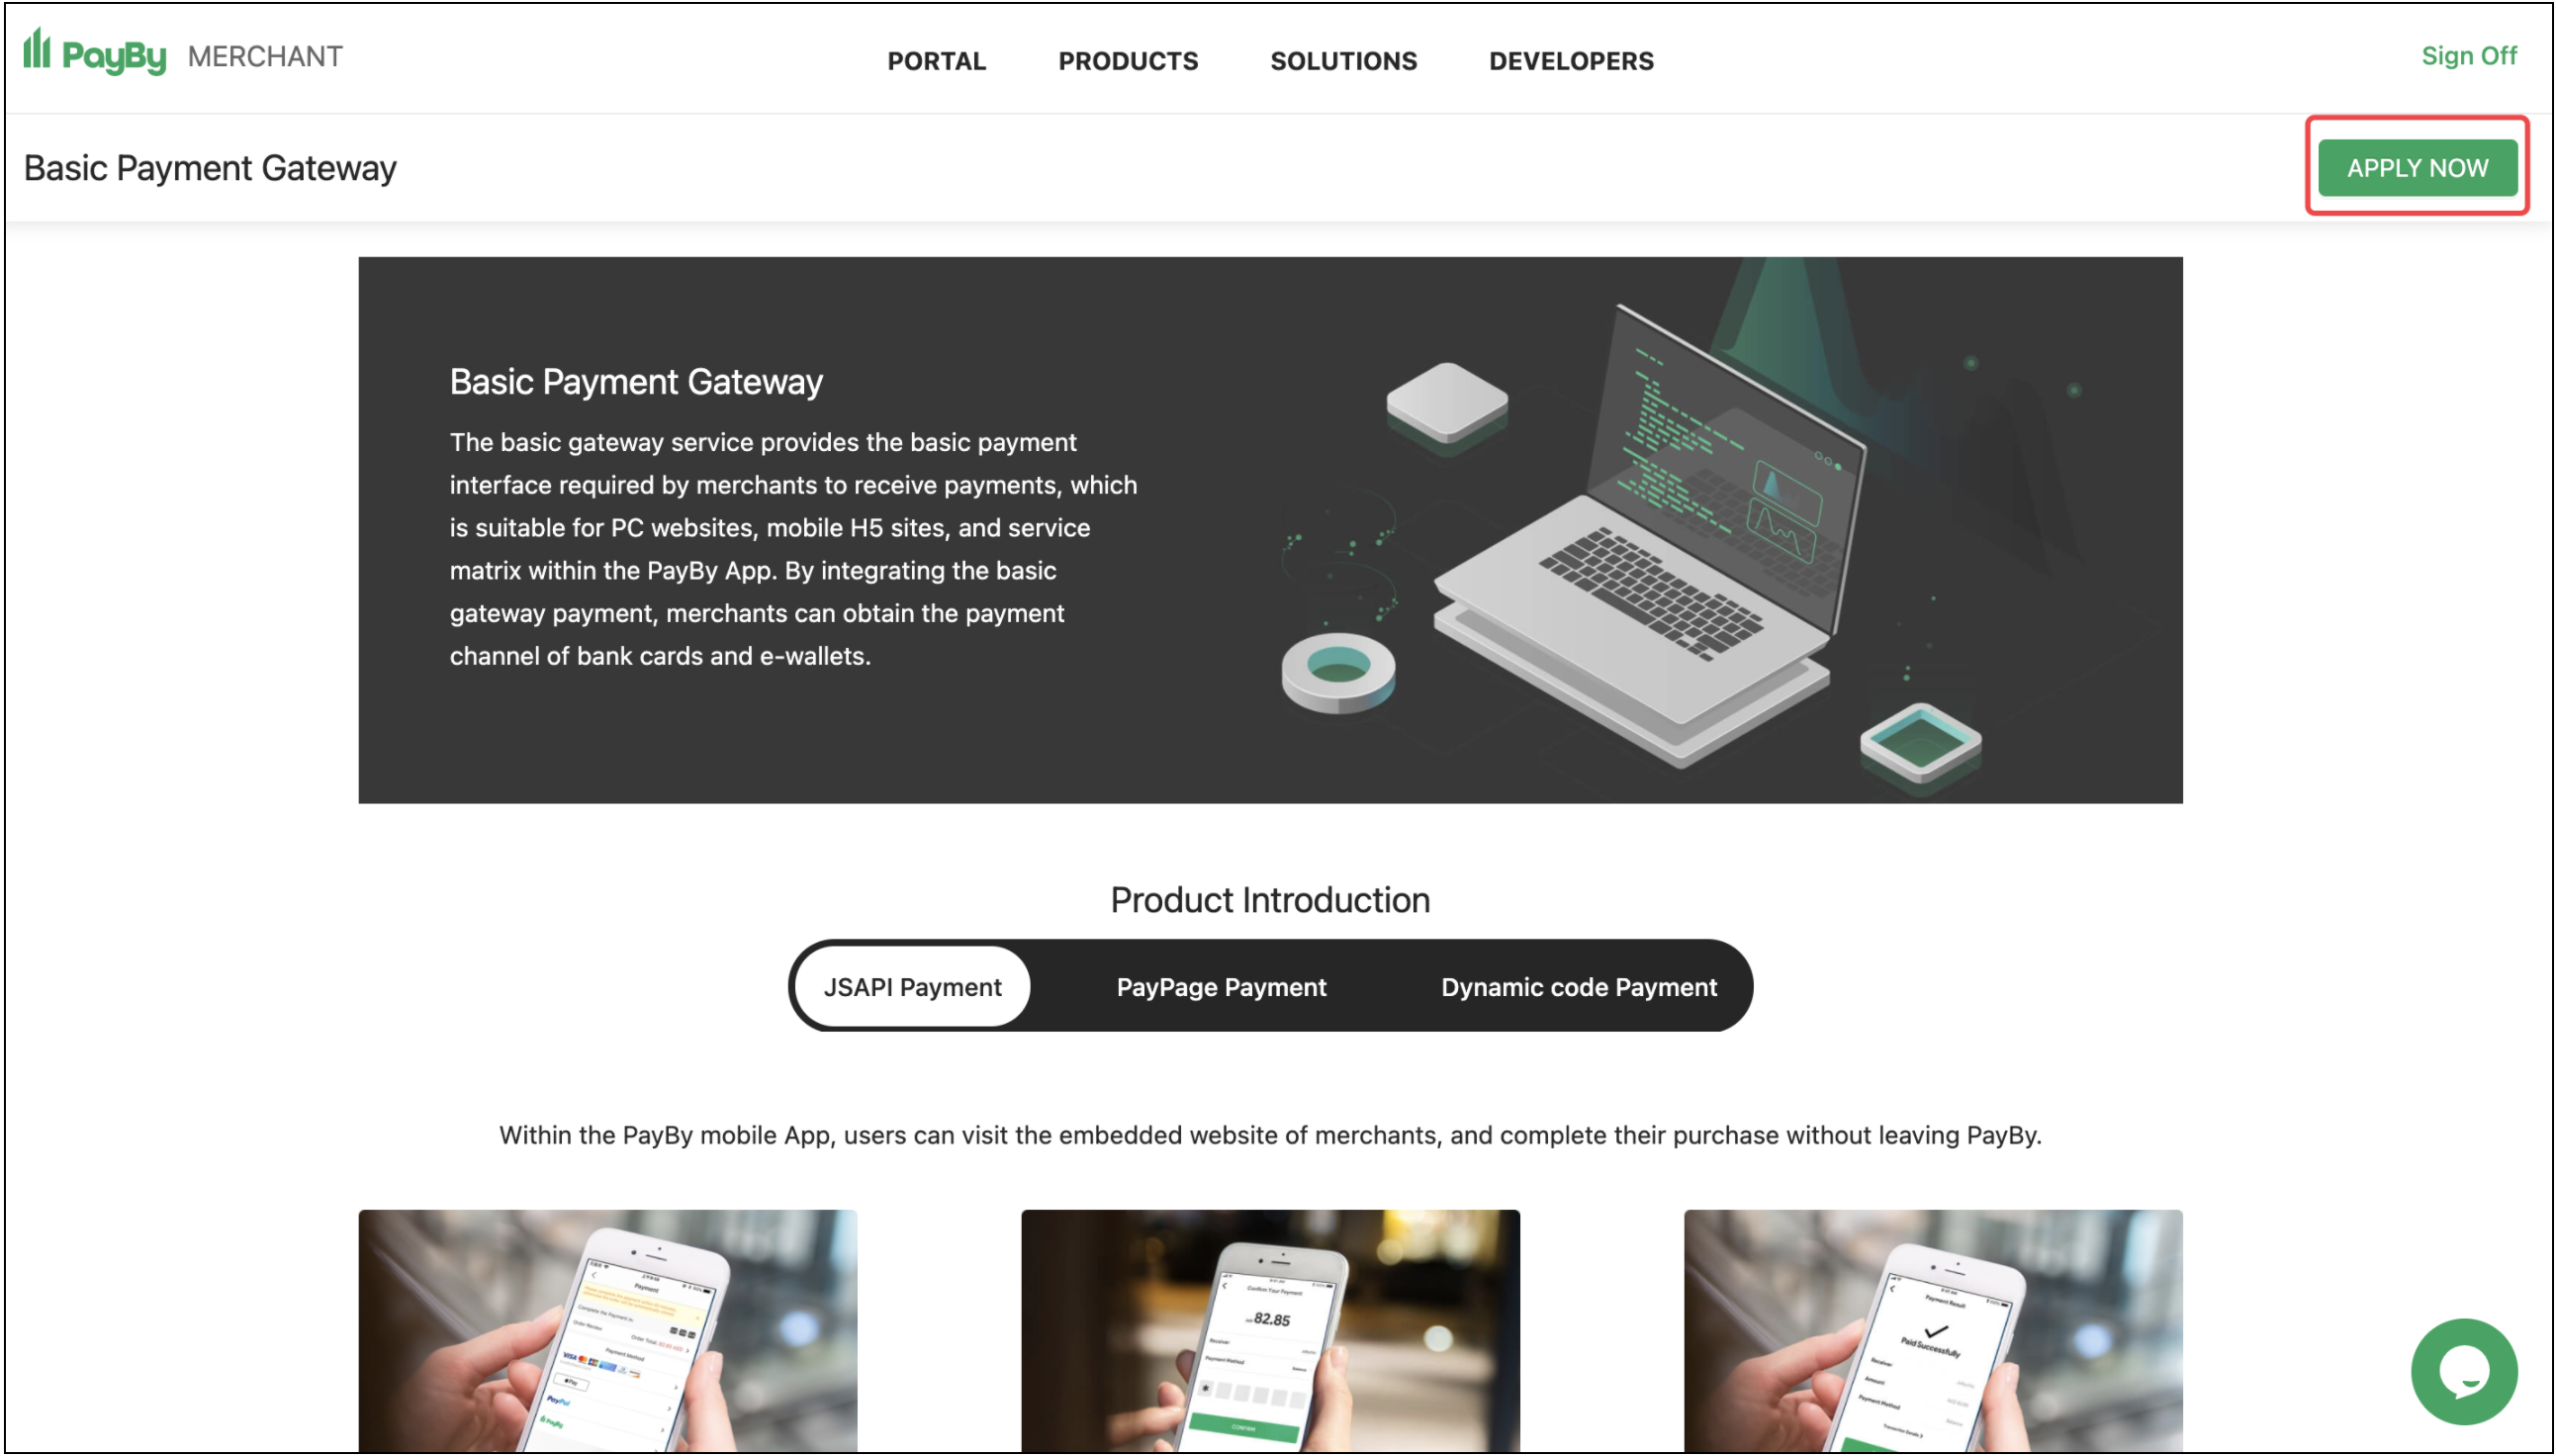
Step 2: Visit the Product List to see the product named Basic Payment Gateway and click APPLY NOW.
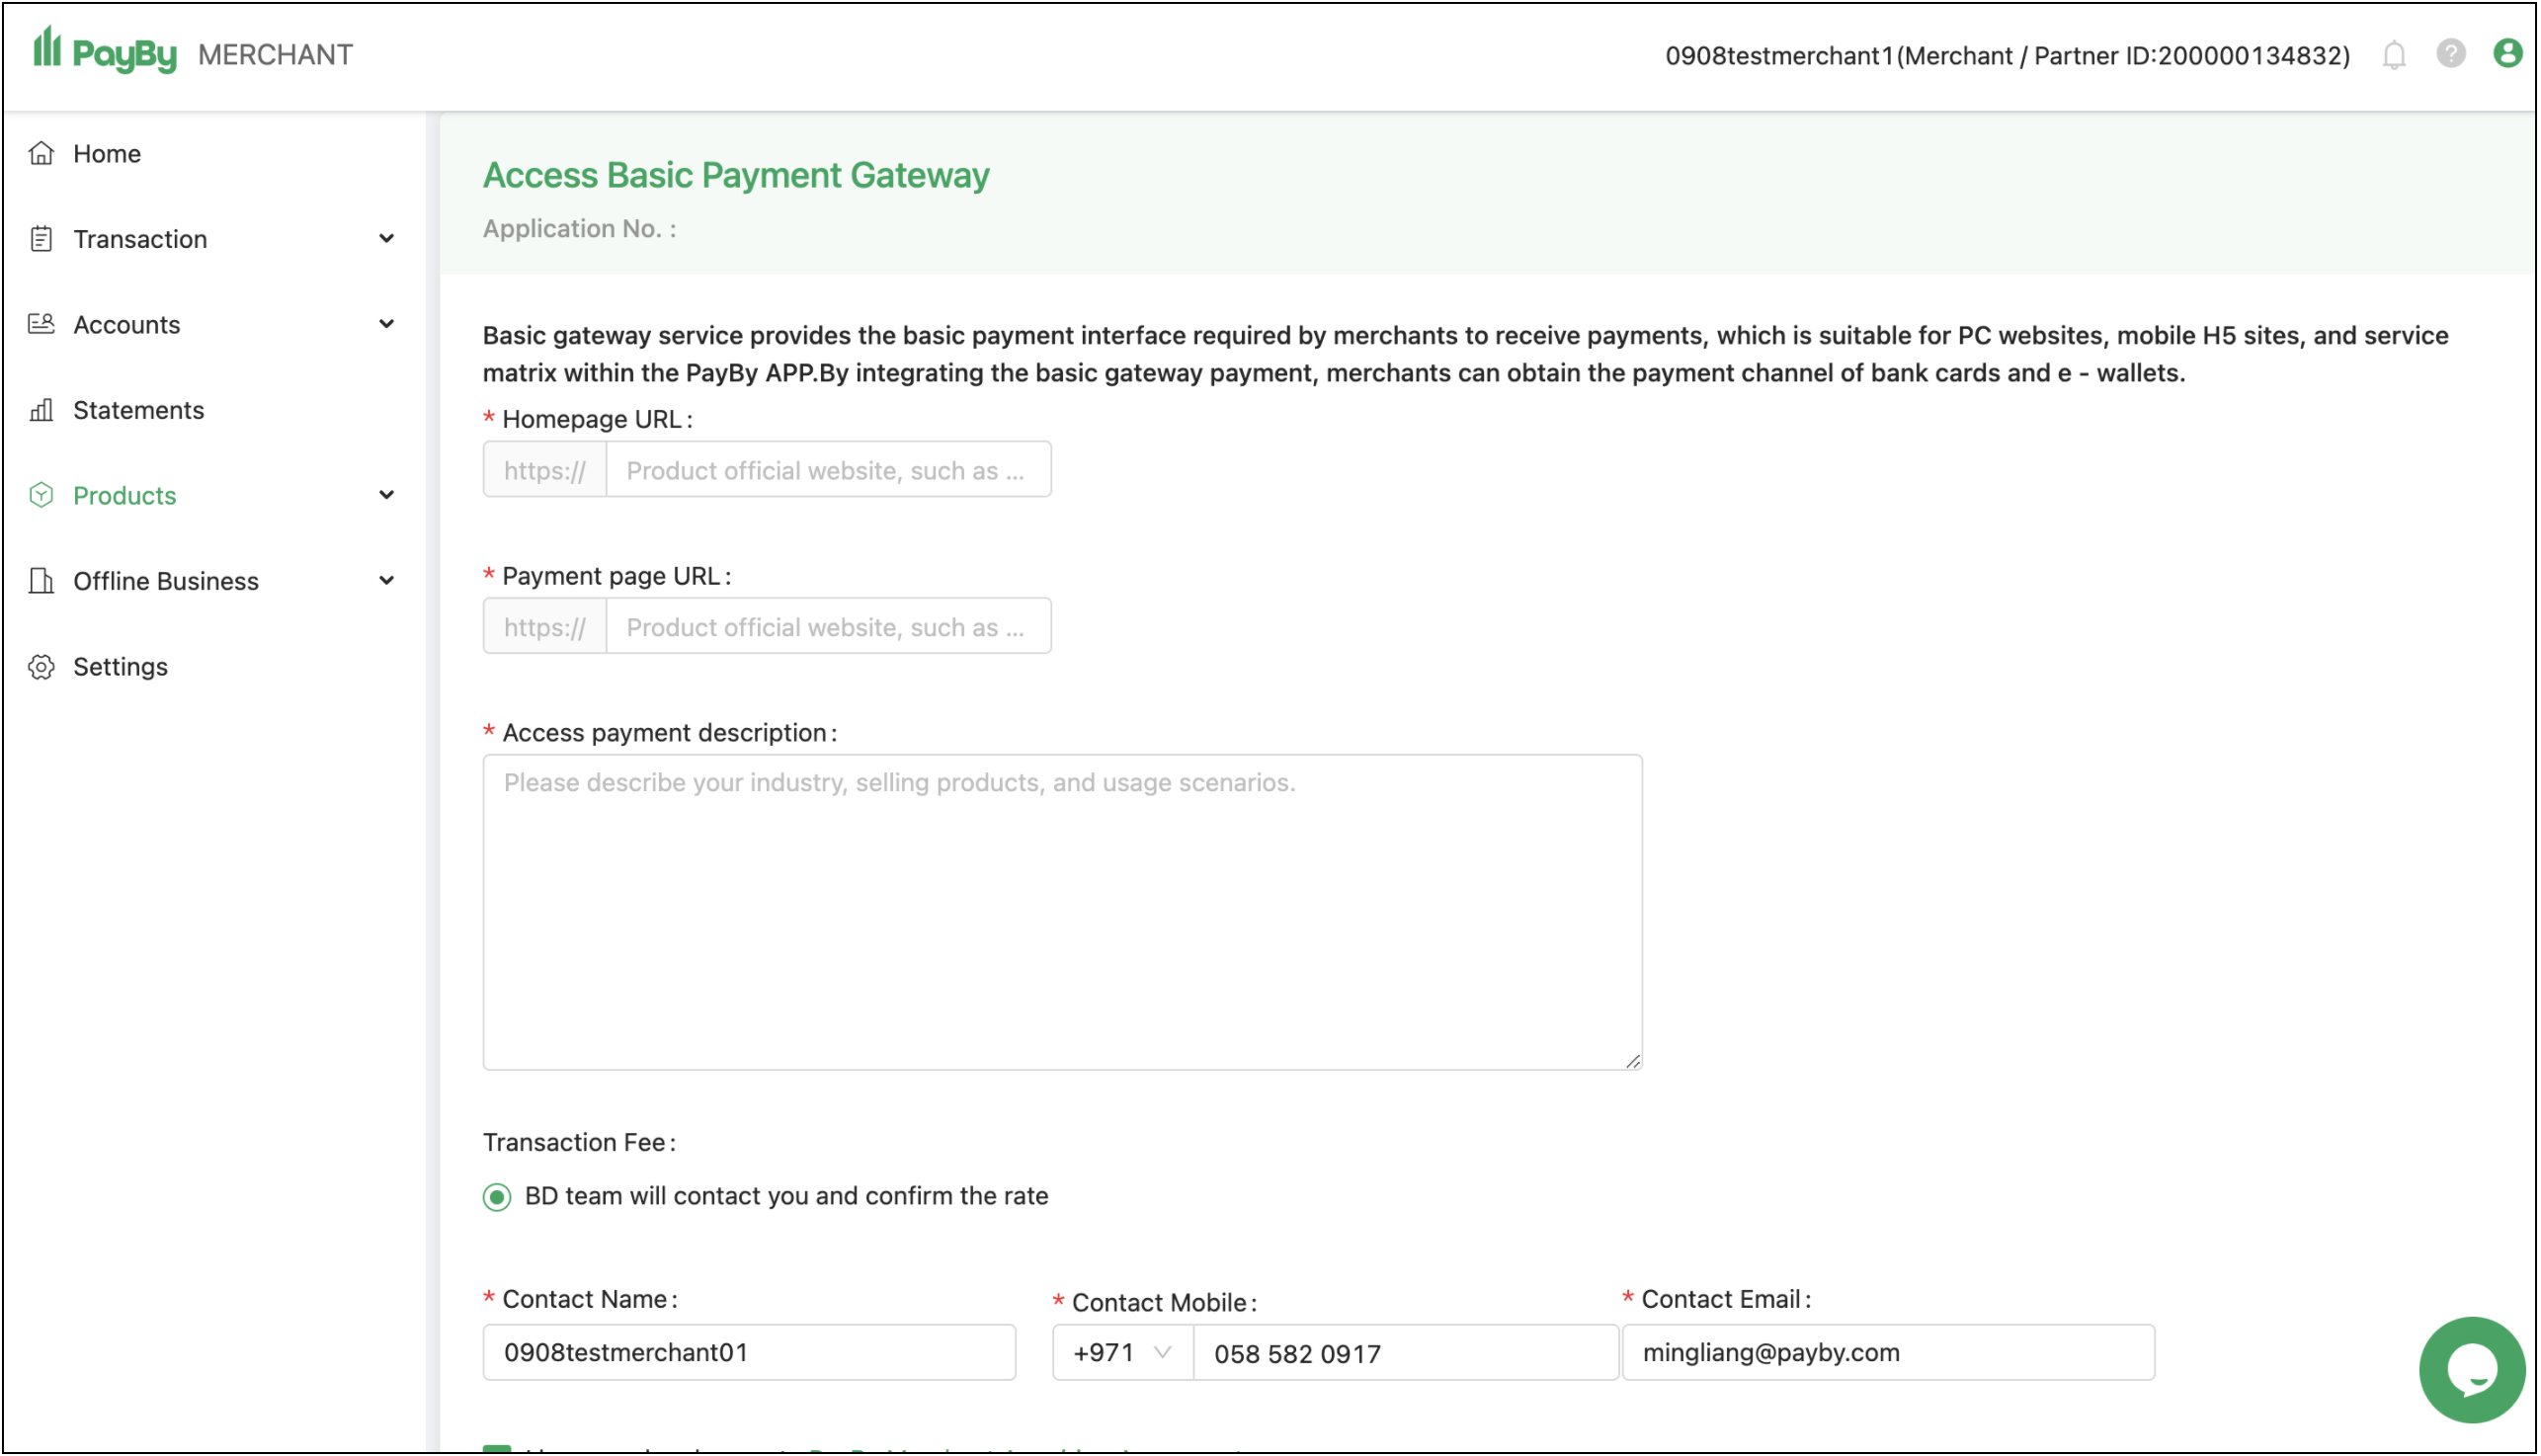
Step 3:Enter the merchant information and submit the application.
Step 4:Once the application is submitted, it will be reviewed by the PayBy team. This usually takes 1-2 working days.
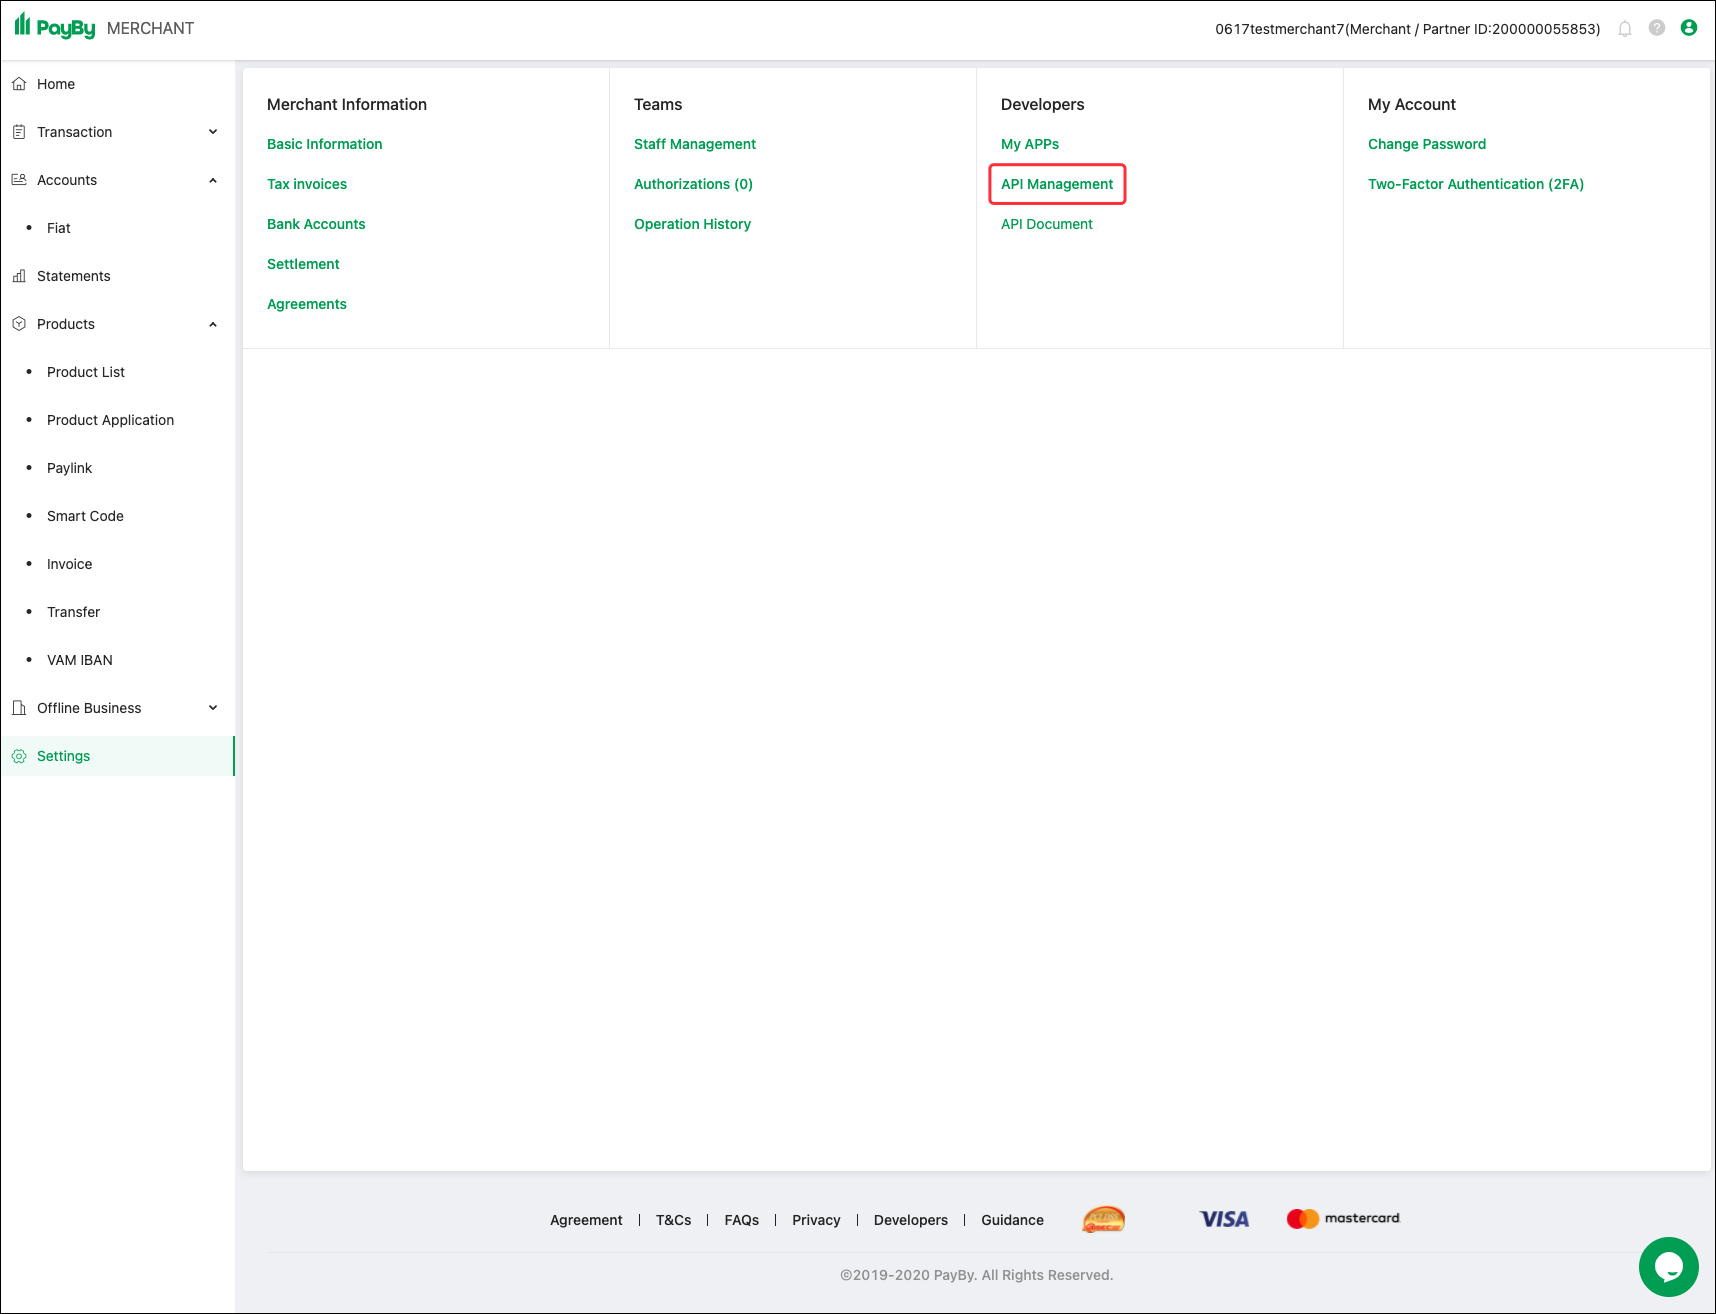
API Management
After submitting your product activation request, please visit the API Management of the merchant portal to configure the basic parameters required for the integration.
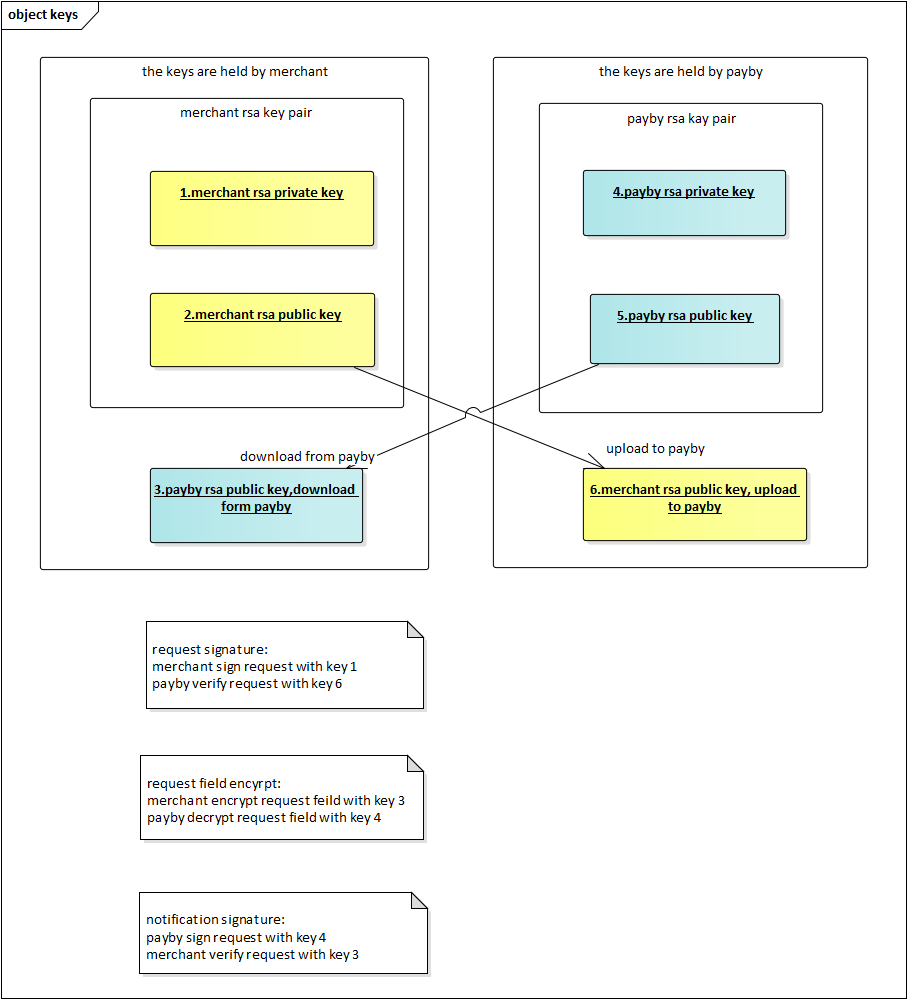
Step 1: Generating the security keys
### Generate private key
# PayBy_key.pem Private key file name
# 2048 Private key size, at least 2048
openssl genrsa -out PayBy_key.pem 2048

### Export public key
# PayBy_key.pem Private key generated in the previous step # PayBy_key_public.pem Exported public key name
openssl rsa -in PayBy_key.pem -out PayBy_key_public.pem -pubout

### Export private key for Java
# PayBy_key.pem Private key generated in the 1st step
# PayBy_key_Private.pem
openssl pkcs8 -in PayBy_key.pem -topk8 -nocrypt -out PayBy_key_private.pem
Step 2: Upload your public key
Upload "PayBy_key_public.pem" on this step. This pem is used to signiture the request from merchant.
Step 3: Download PayBy Public Key
This pem is used to Verify the response from PayBy and Encrypting senitive information.
Step 4:Bind IP address (Required)
This IP address is outbound IP of Merchant system. PayBy provides you with a strong API through which you can enjoy services such as placeOrder, getOrder, etc. View How To Use via Developers website. For security reasons, we recommend that API should bind at least one IP address. If there is only one IP address, you can enter it directly. If there is more than one IP address, you should separate them with halfwidth comma (e.g. 192.168.1.1,192.168.1.2,192.168.1.3) or Replace with (e.g. 192.168..,172.16.9.,192.168.1.1). If you want to allow any ip addresses,you can only enter *."
Integration Steps
Step 1: Download
https://github.com/PayBy/Extenstions/blob/master/woocommerce-payment-gateway-payby.zip
Step 2: Install Plugin
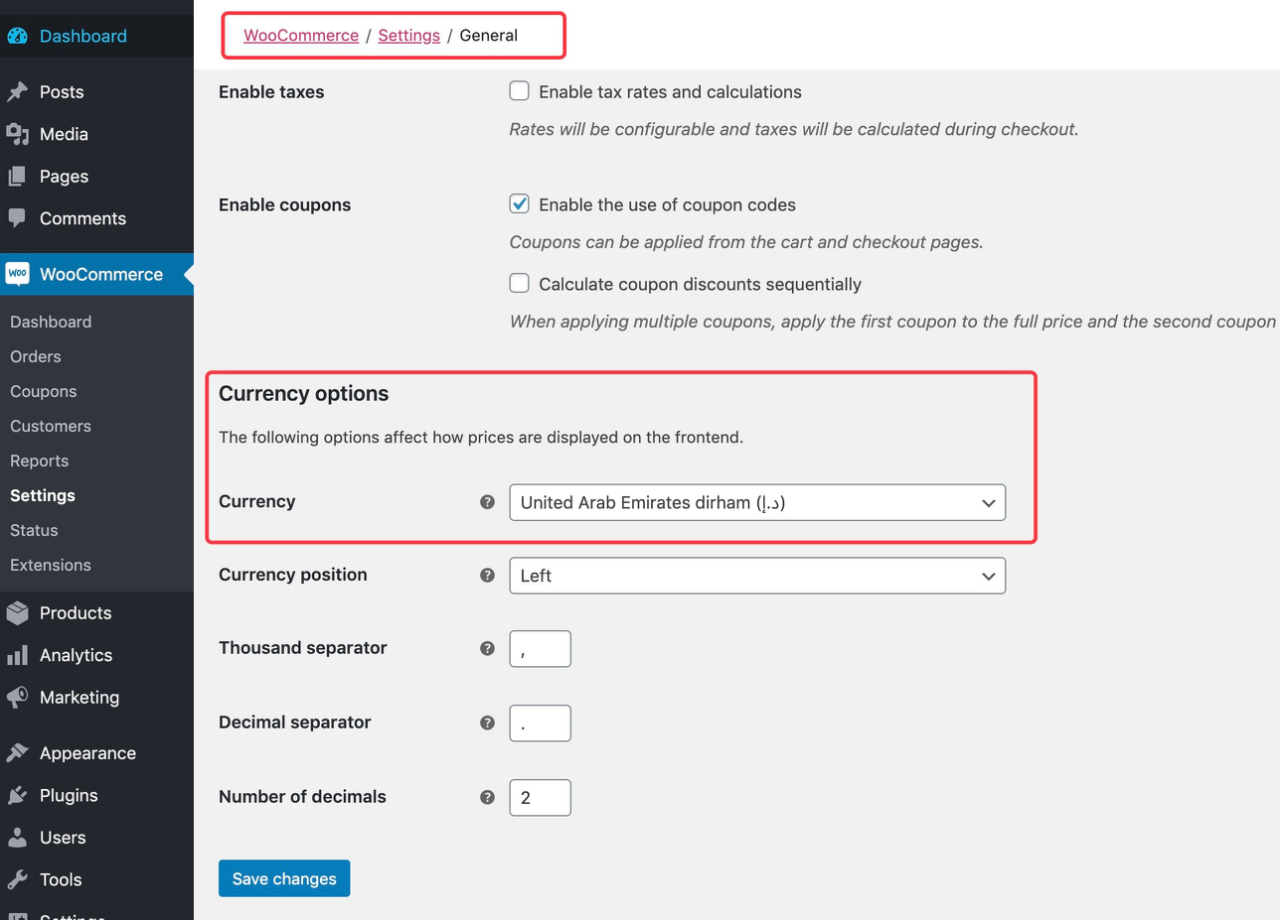
- Set the payment currency to AED – United Arab Emirates Dirham.
- Set up the Wordpress And Woocommerce.
- Log into the admin page.
- Navigate to Plugins → Add New
- Upload the compressed files called 'woocommerce-payment-gateway-payby.zip'.
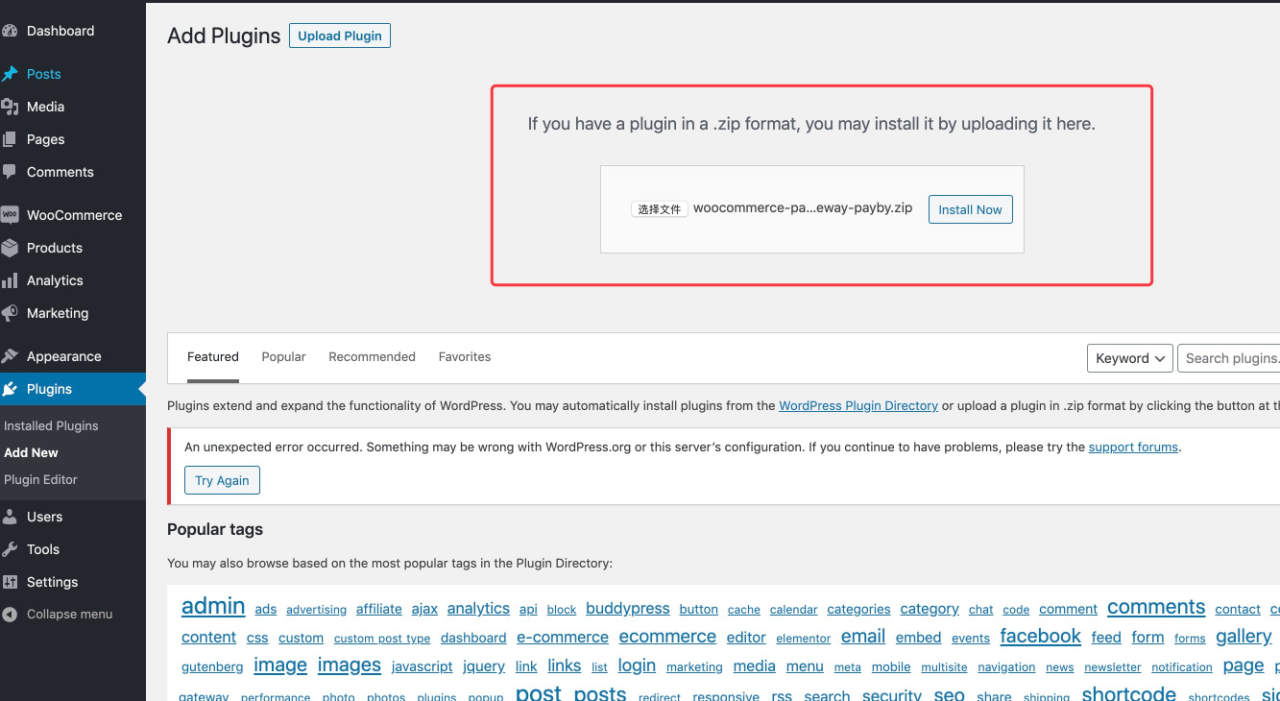
Click the Install Now button.
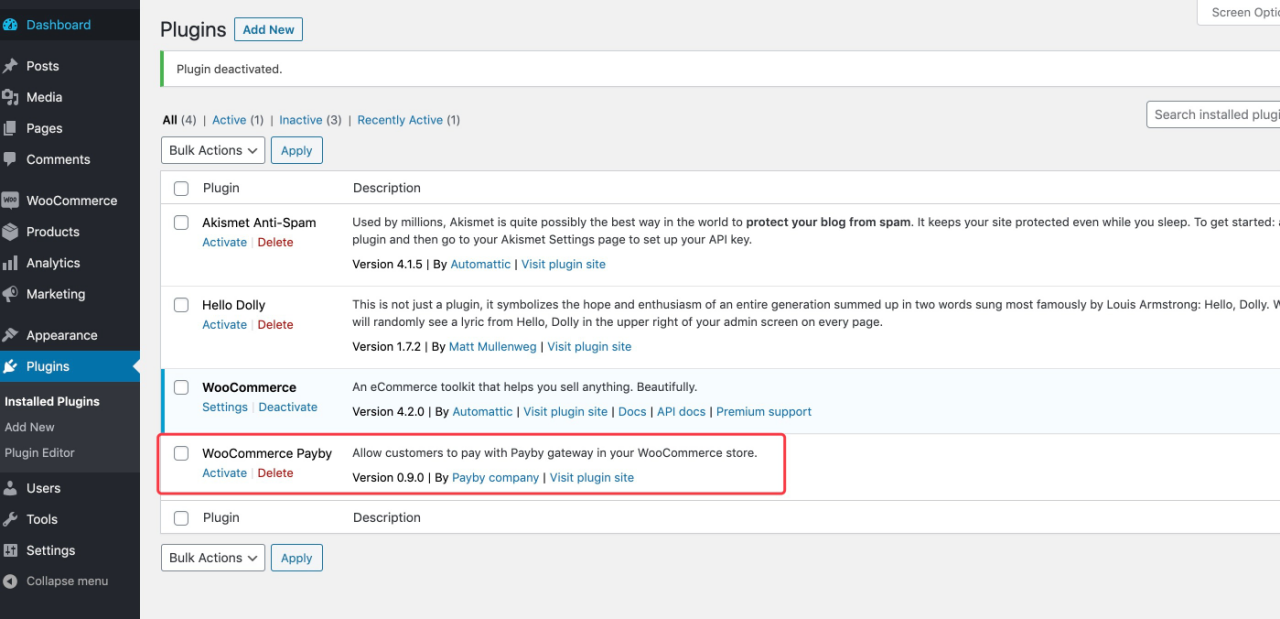
Navigate to WooCommerce → Installed Plugins
Click on the Activate button.
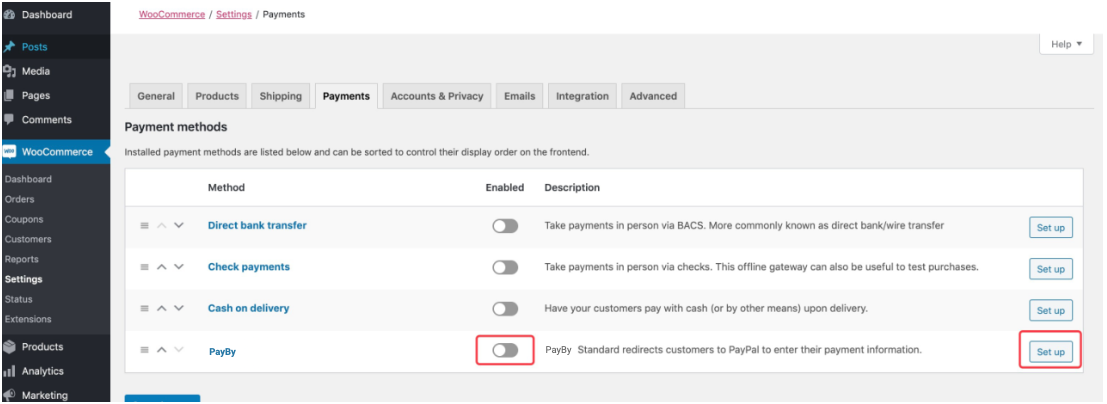
Step 3: Configure WooCommerce
- Navigate to WooCommerce → Setting
- Set PayBy as the payment method.
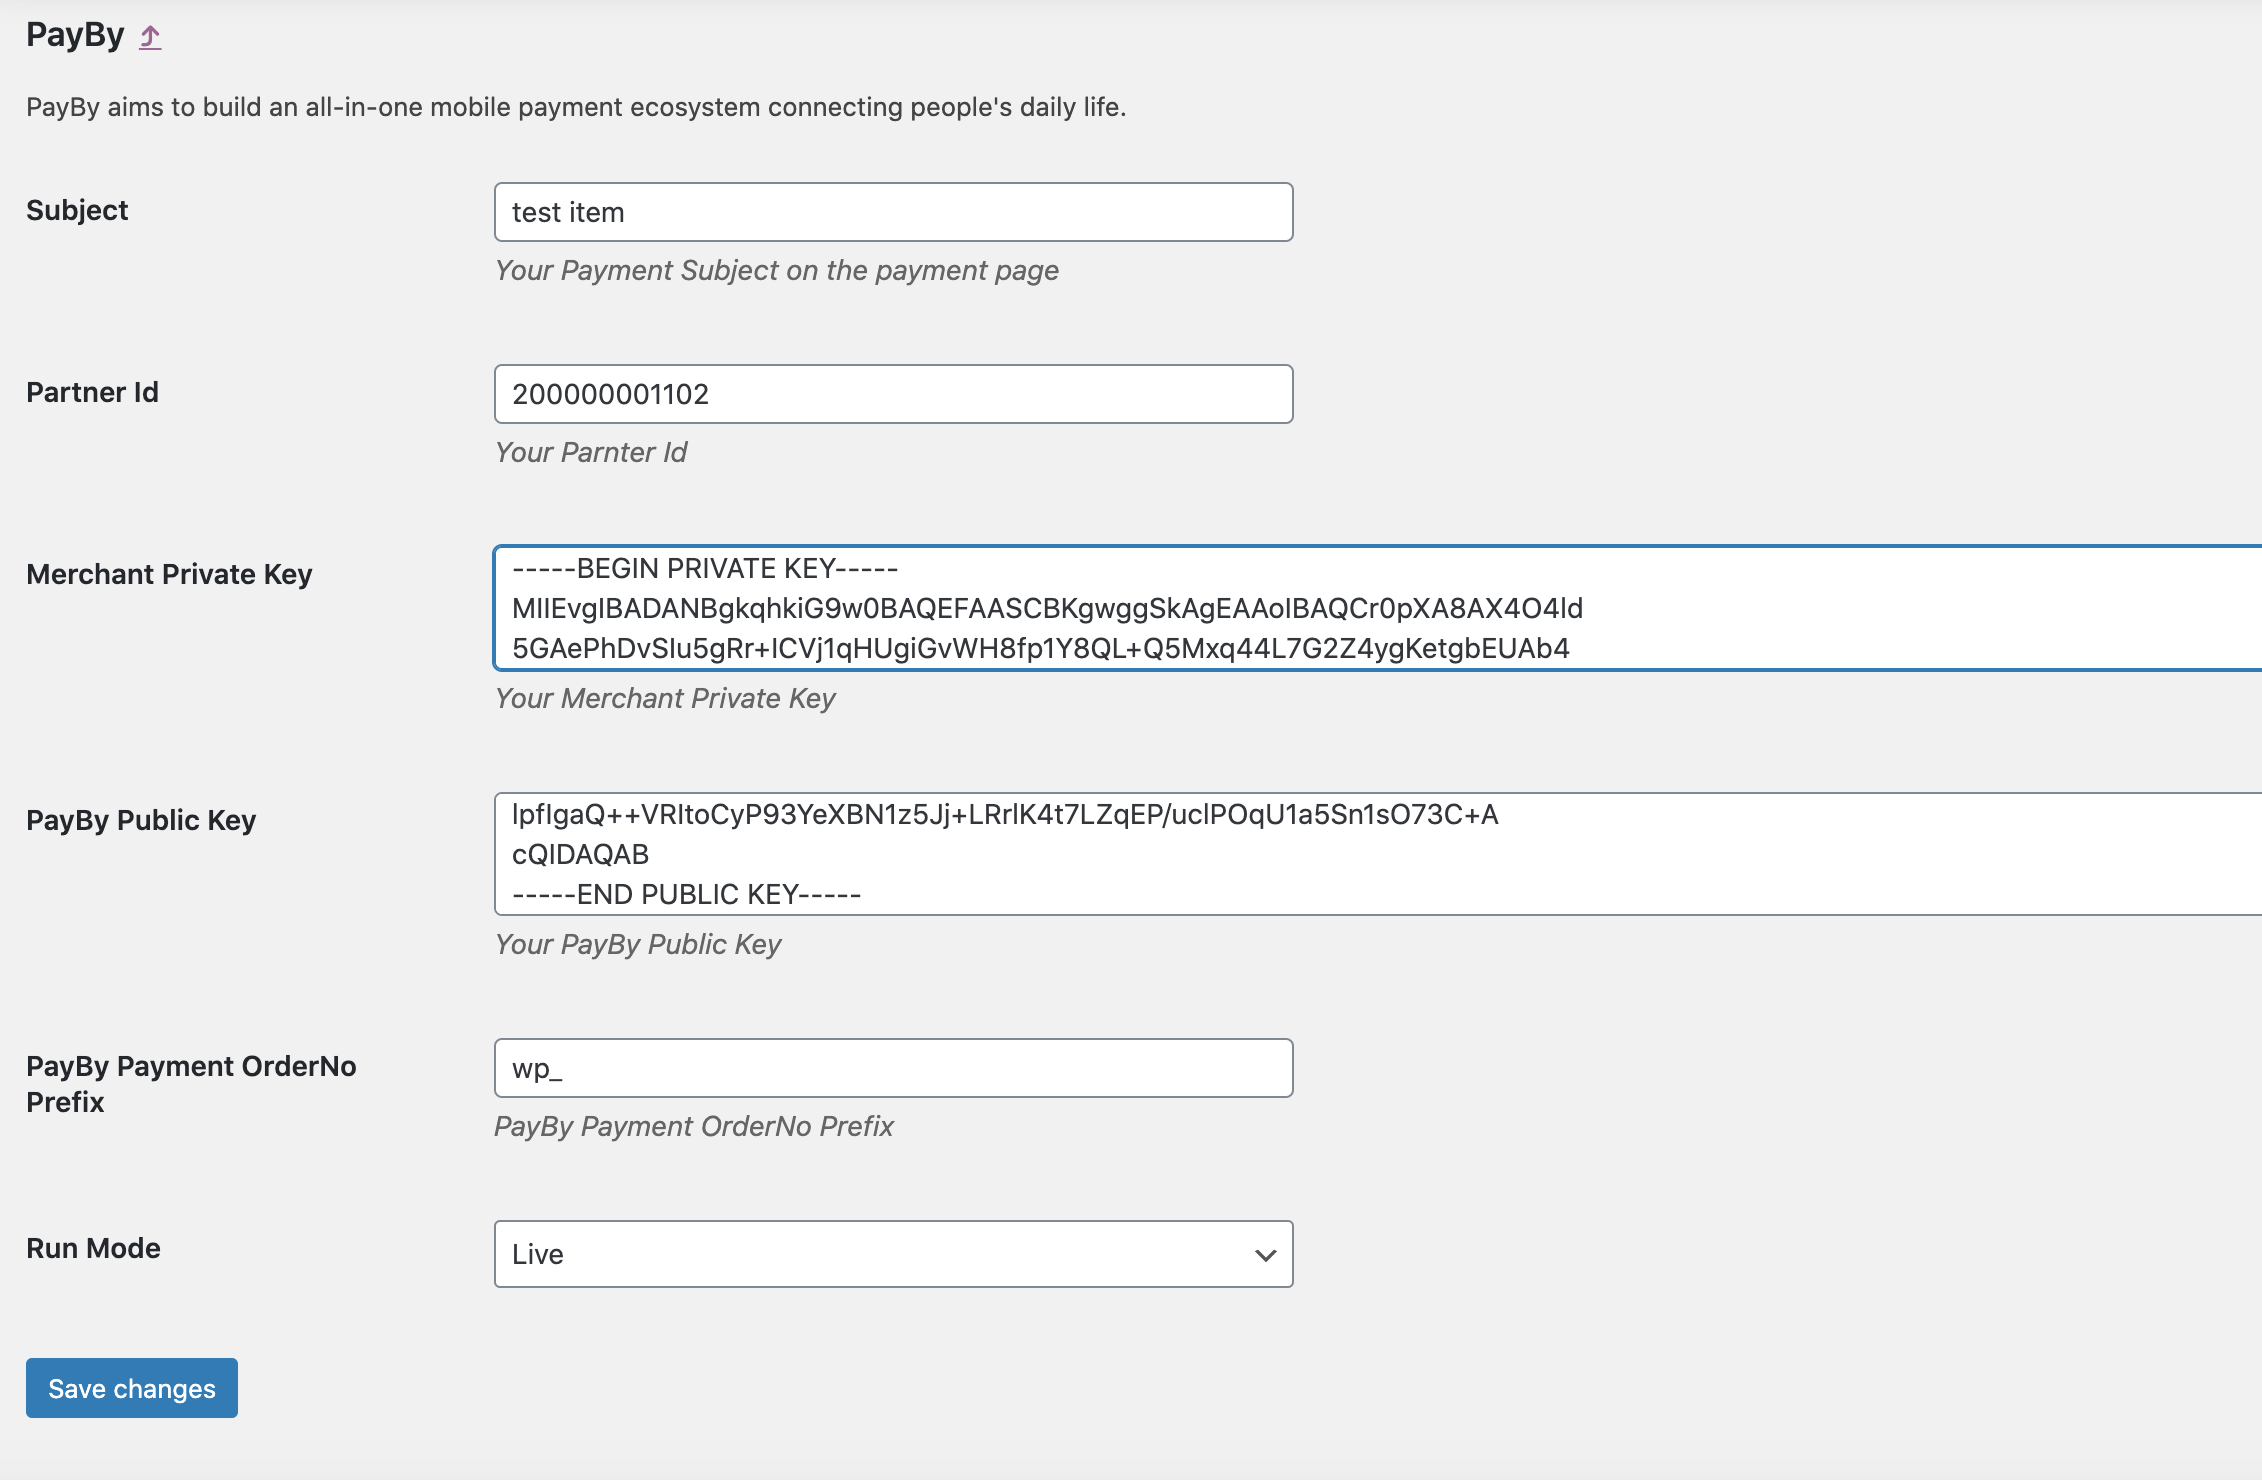
- Enter the Subject provided.
- Enter the Merchant Partner Id provided.
- Enter the Merchant Private Key provided. (Don't remove the -----BEGIN PRIVATE KEY----- and -----END PRIVATE KEY-----)
- Enter the PayBy Public Key provided. (Don't remove the -----BEGIN PUBLIC KEY----- and -----END PUBLIC KEY-----)
- Select Run Mode UAT for testing, Production for general usage.
- Enter PayBy Payment OrderNo Prefix like 'wp_'
- Click on Save changes to update the settings.
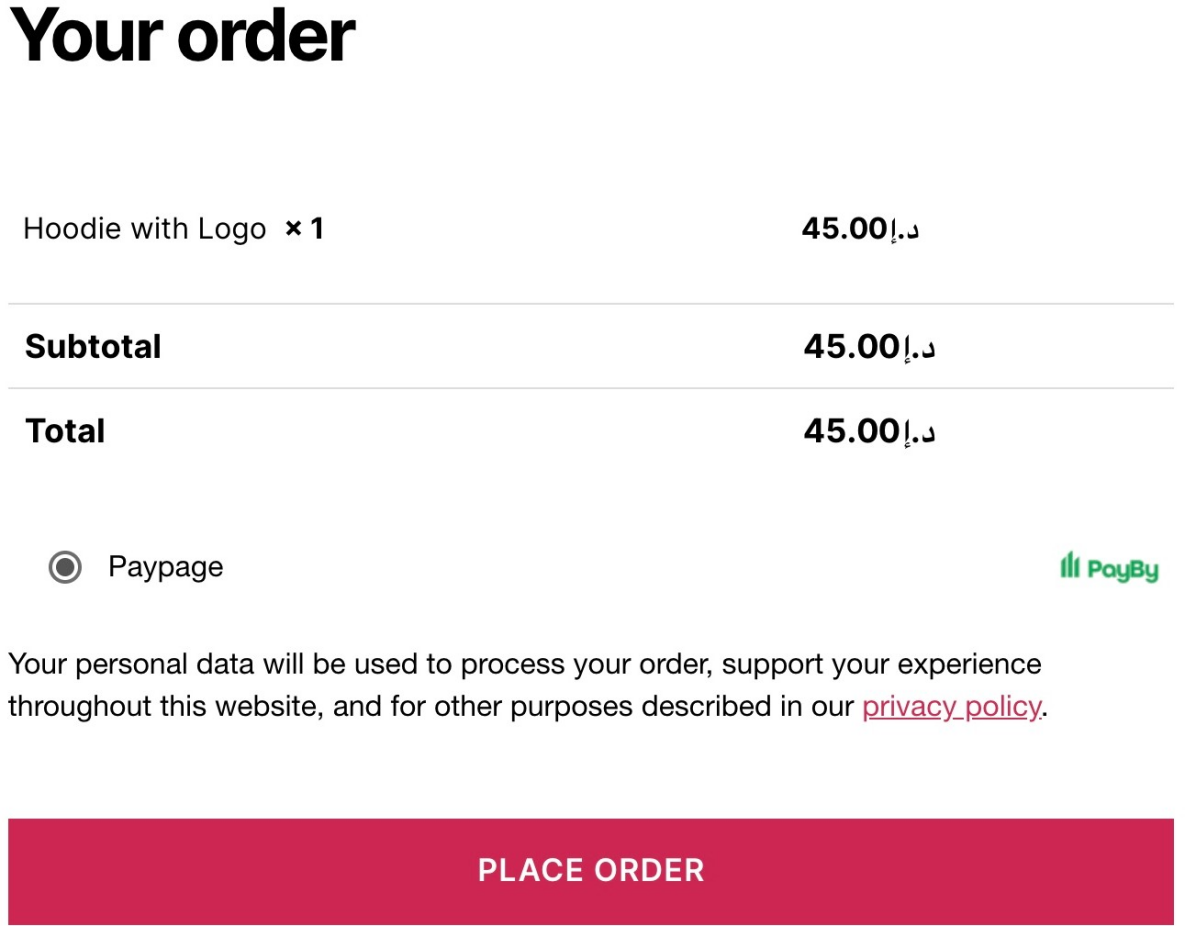
Step 4: Check front checkout page
1: Select PayBy as the payment method and place the order.
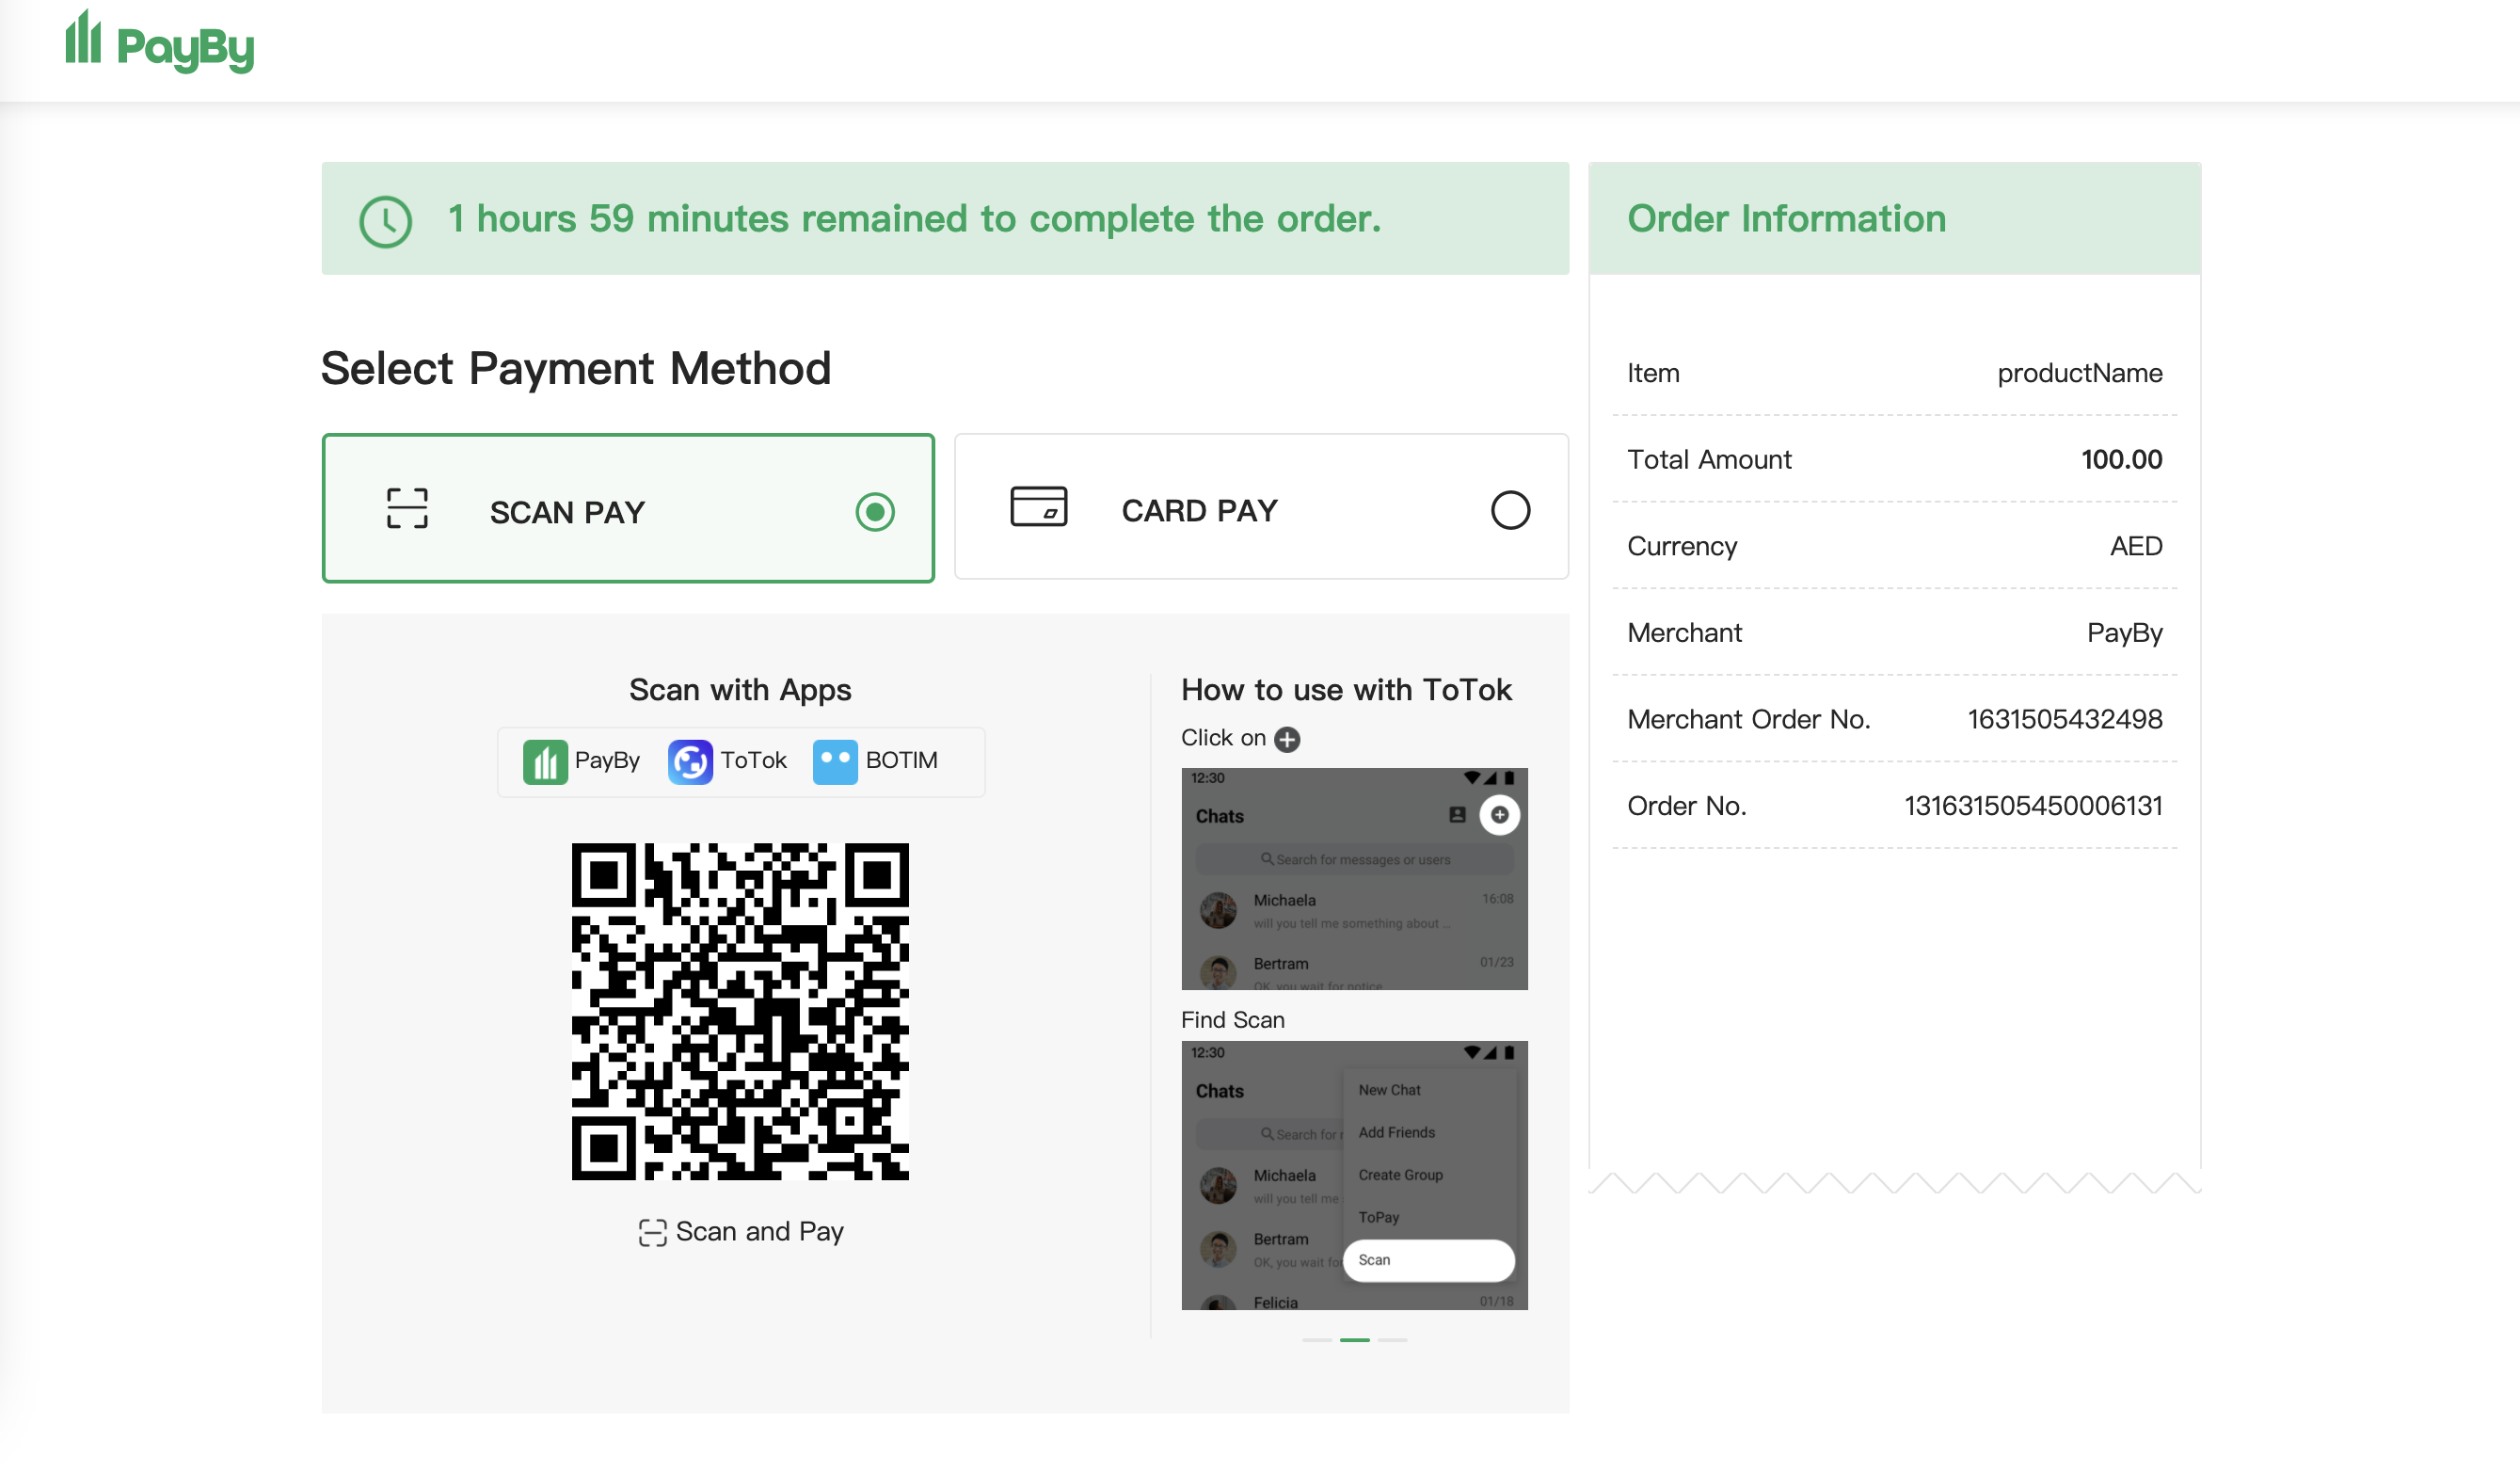
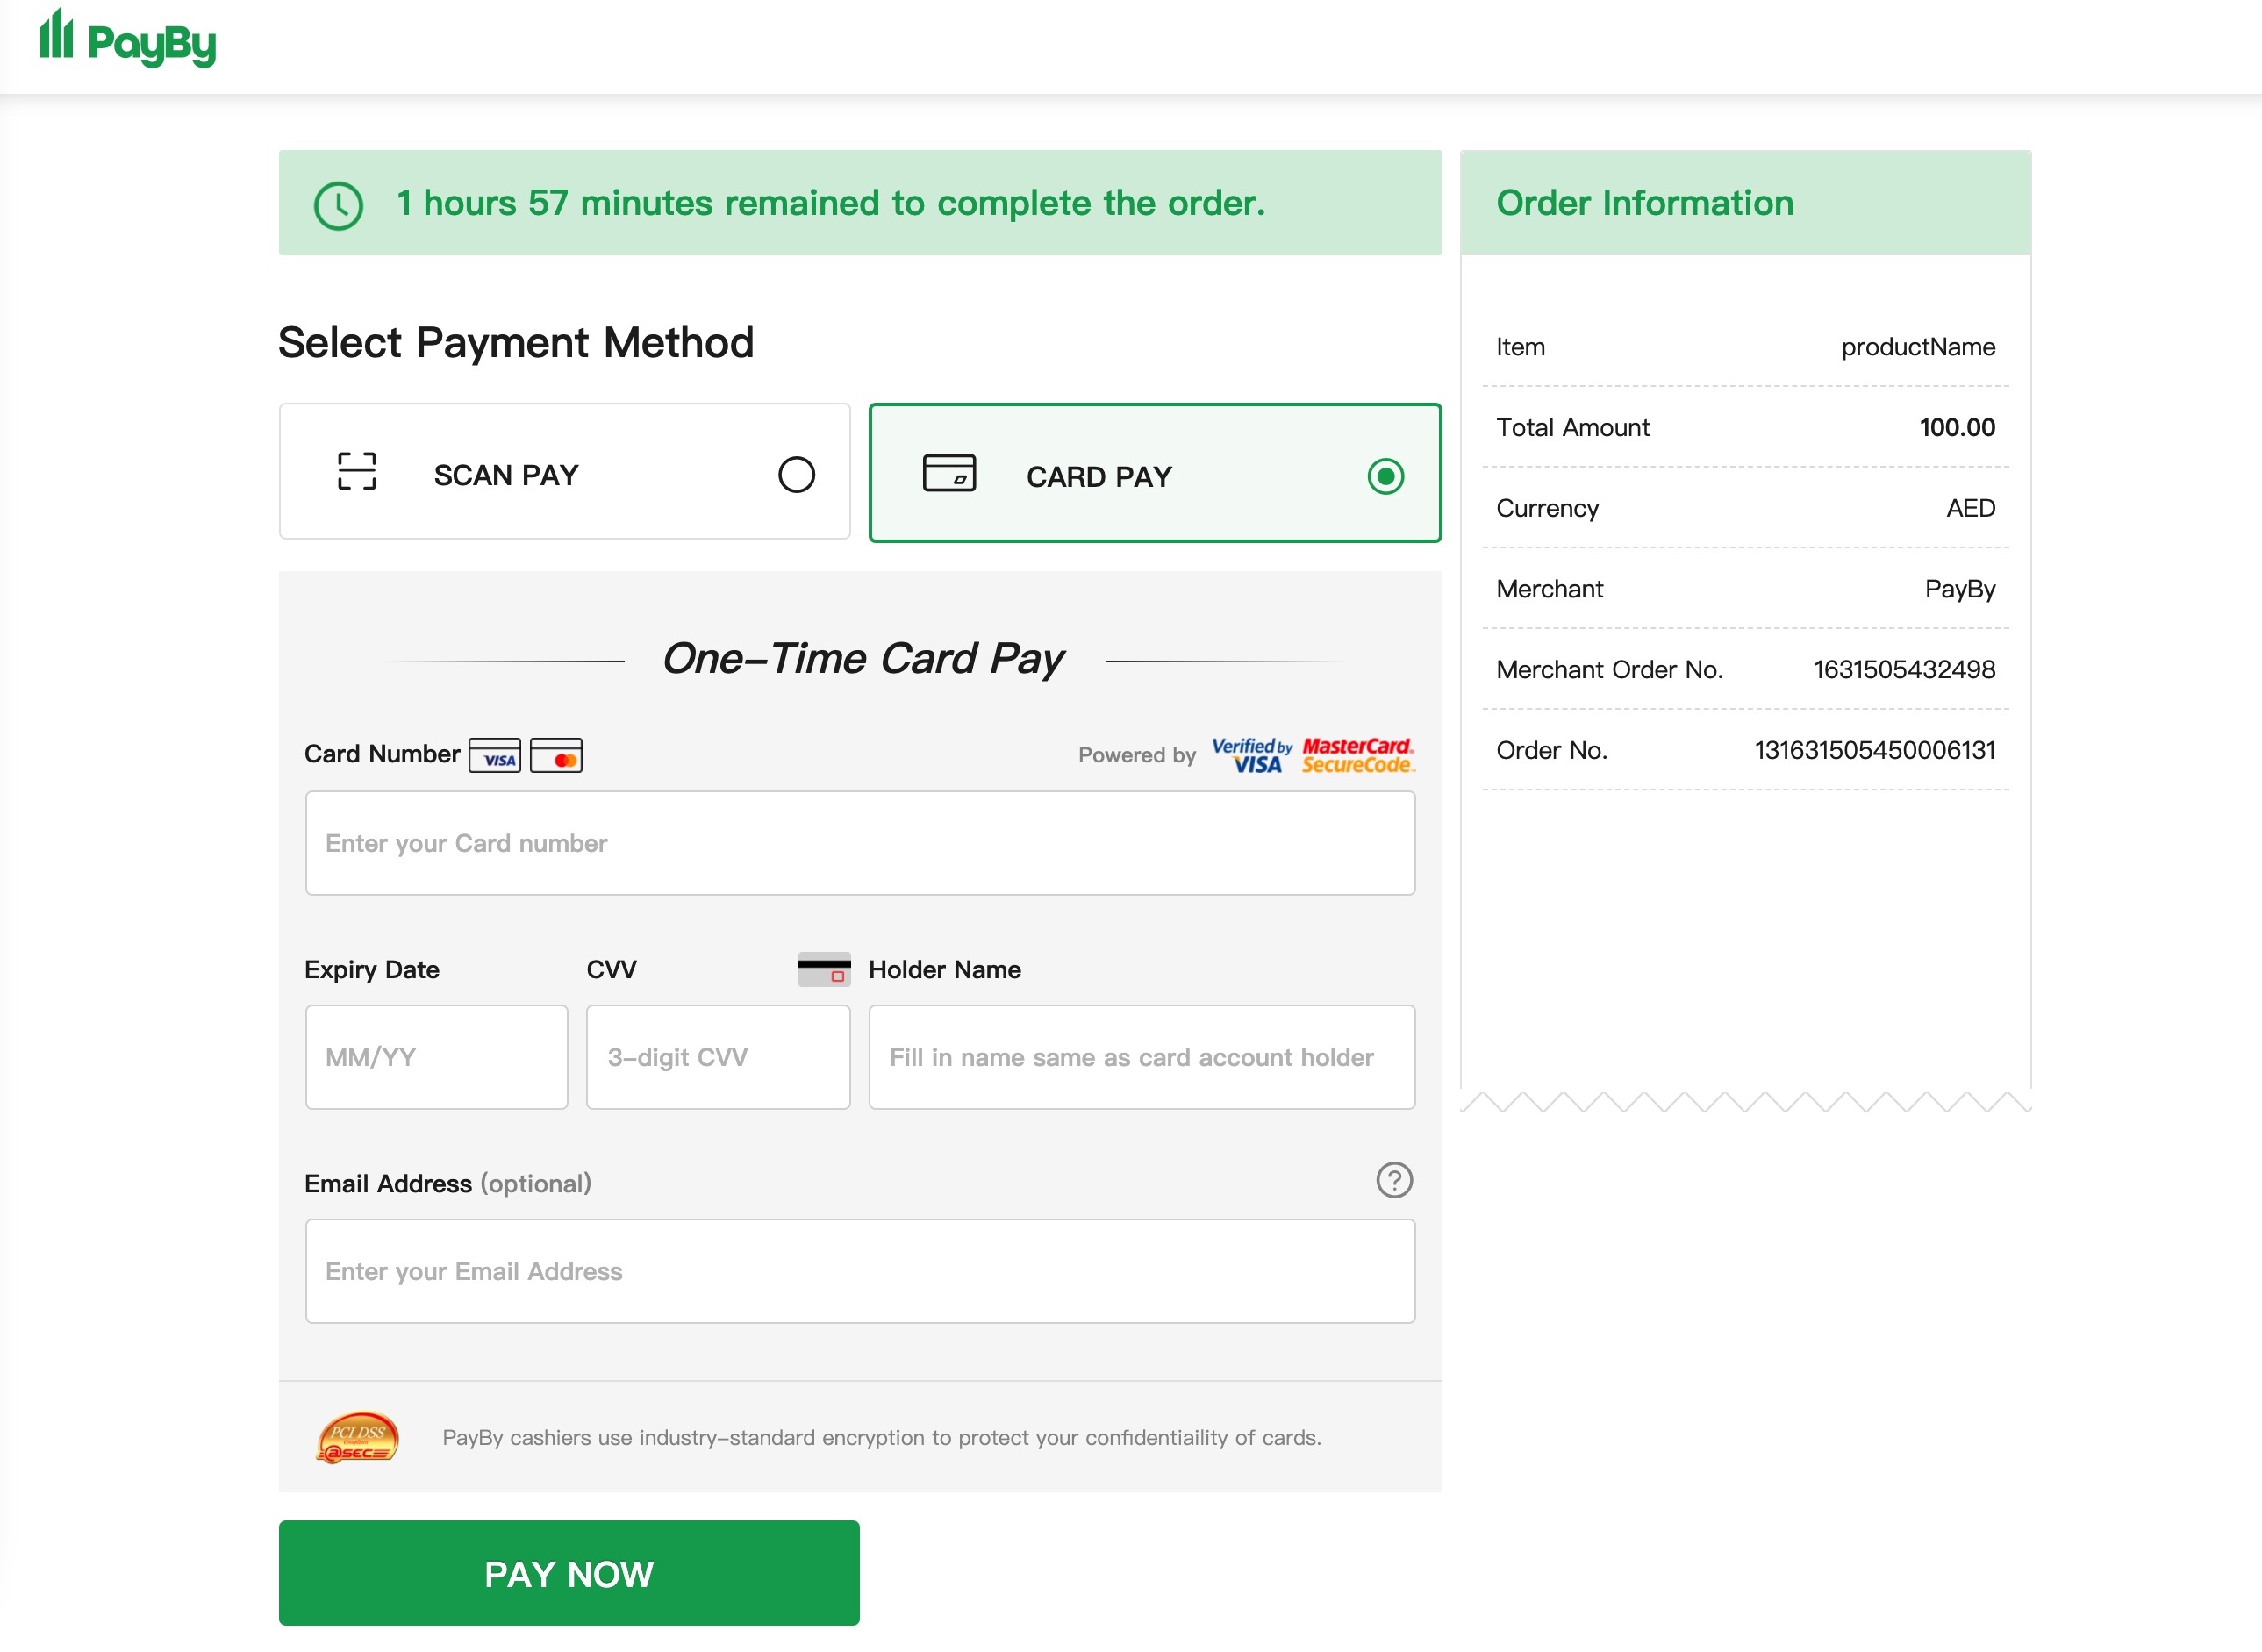
2: The page will be redirected to the PayPage, choose to pay by SCAN PAY or CARD PAY.
Option A:
Option B:
Step 3: View payment results in Orders. 